
As a marketer, when you start planning a campaign, the first and most important thing is to think about what goals you want to achieve from it - and to evaluate whether the activities you’ve done are actually working, you need Tracking.
Here are the 5 steps I apply in my work.
Step 1: Decide what to track
Depending on the purpose of your campaign, you pick the right KPIs:
- Engagement (driving traffic) or Conversion (turning users into customers/service users)? Each goal has different metrics.
- Which channel are you using? For example: email, CPC (if it’s paid banner placements), display (if you’re placing banners on satellite pages), affiliate, KOL, etc.
Step 2: Choose your UTM parameters
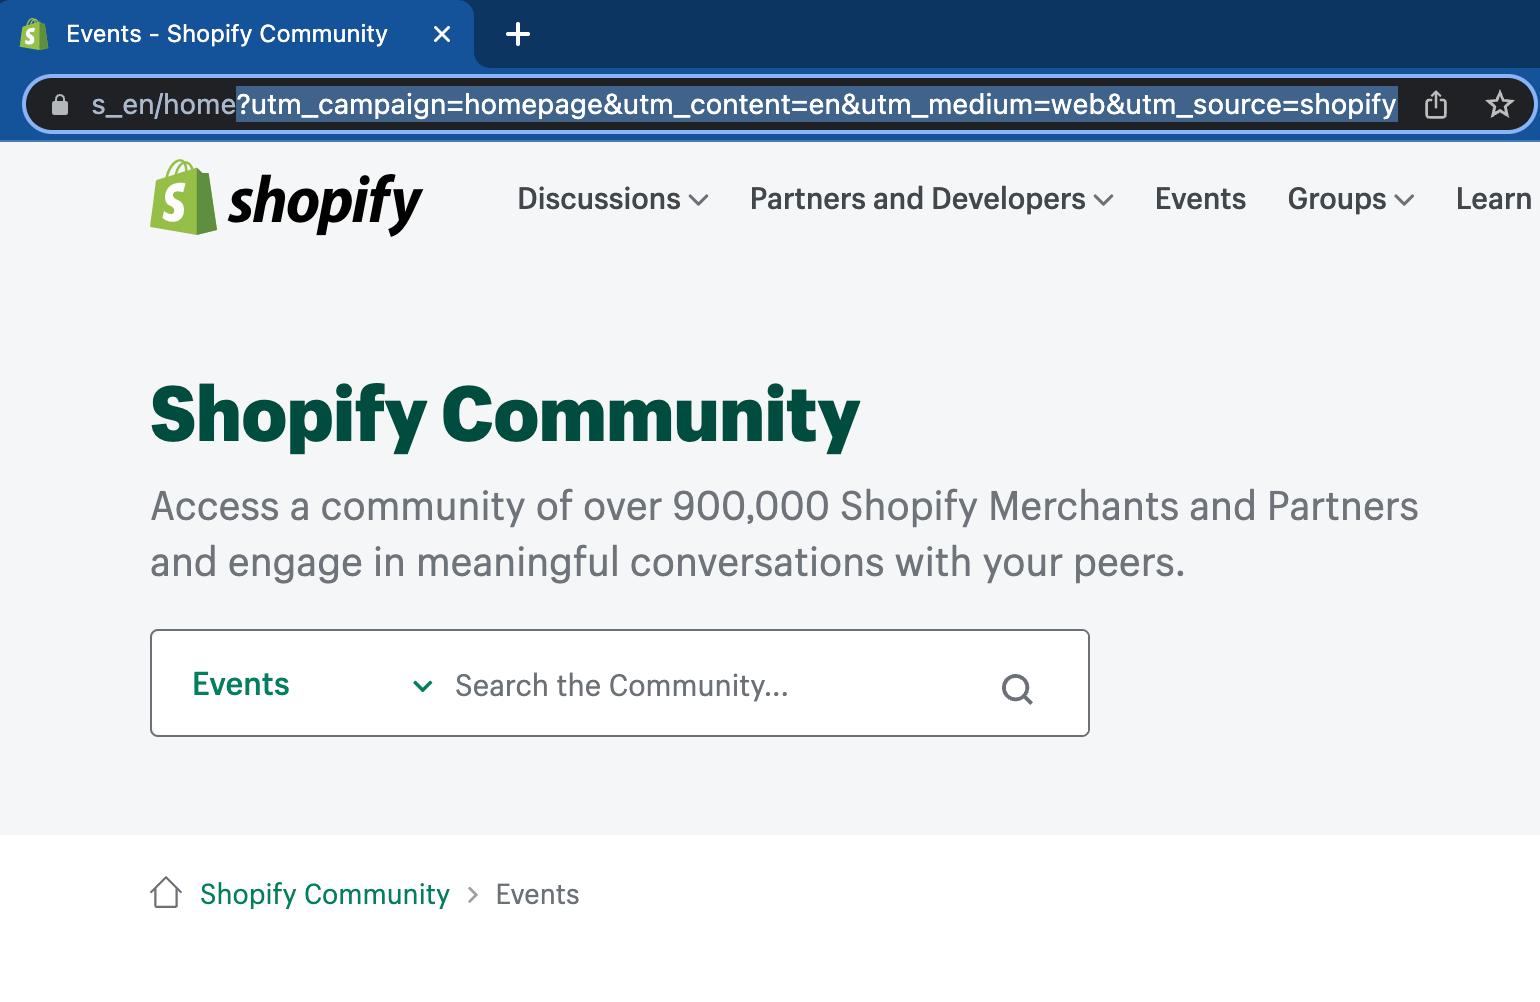
You’ve probably noticed those very long URLs when you click on certain links - the part after the ”?” is the UTM Parameter. Each parameter describes something different about the link you clicked, and they’re separated by an ”&” sign. When someone clicks that link, Google Analytics reads and records the data.
These parameters come in two types: required and optional.
www.yoursite.com/?utm_source=kol_name&utm_medium=influencer&utm_campaign=kol_spring_promo
Required parameters
- Campaign source (utm_source): describes the website or source where you placed the link - usually the name of the site displaying your content or ads
- utm_source=facebook
- utm_source=twitter
- utm_source=jennie+blackpink
- Campaign medium (utm_medium): the term describing the marketing activity - you can use ppc (pay per click), email, display, kol, etc.
- Campaign name (utm_campaign): the name of the campaign you’re running, for example: utm_campaign=black+friday+sale
Optional parameters
- Campaign term (utm_term): use this if you’re running Google Ads
- Campaign content (utm_content): use this if you have multiple content variants and want to run A/B testing to see which drives more traffic; for example, if a single email has two links back to your website, this parameter lets you tell them apart
- utm_content=first+cta+button - attach to the first link
- utm_content=second+cta+button - attach to the second link
Step 3: Create trackable URLs
This tool will help you build tracking URLs - bookmark it:
https://ga-dev-tools.google/ga4/campaign-url-builder/
Let’s walk through an example:
www.yoursite.com/?utm_source=kol_name&utm_medium=influencer&utm_campaign=kol_spring_promo
utm_source=kol_name: replace “kol_name” with an actual name, e.g. jennie - this tells us who generated the trafficutm_medium=influencer: indicates this is the influencer channelutm_campaign=kol_spring_promo: replace “kol_spring_promo” with your campaign name - could be a product launch or a monthly promo campaign
That gives us a URL like this: www.nhatnguyends.com/?utm_source=jennie&utm_medium=influencer&utm_campaign=summer_promo. If my company books Jennie as a KOL, we’d send this link in the content brief so she can include it in her posts. Anyone who discovers the campaign through Jennie’s link gets tracked.
At this point you’ve completed the essential steps for tracking your campaign performance. Now all you need to do is compile a list of URLs to track and send them to each distribution channel.
That said, if you’re the type who doesn’t want to use those long, industrial-looking URLs - you want something clean and pretty but still trackable - then keep reading for Step 4.
Step 4: Make your URLs look natural
Here’s an example I made: https://ashguard.xyz/k10
Try clicking that link and look at what URL appears in your browser.
This is a link I created to send to KOLs for our NFT product launch. It’s short, uses our own domain, and is easy for KOLs to use as a CTA link without looking spammy.
To do this, you need to set up a Redirect Link to create a Custom URL. This step involves some technical work and requires access to your website hosting - so the simplest approach is to put together a spreadsheet with the original links and the shortened versions you want, then ask your dev team to handle it.
A popular alternative is to use link shorteners like Bitly. You can go with this option if you don’t have your own website - but it won’t give you the professional look you want, you’re dependent on a third-party server’s speed (Bitly is notorious for slow redirects), and it doesn’t inspire trust (people know Bitly links can lead to scam sites or malware, so cautious users won’t click).
If you want to handle it yourself, the image below is a guide - courtesy of ChatGPT - and you’ll need access to your website’s hosting.
Step 5: Launch and monitor results in Google Analytics
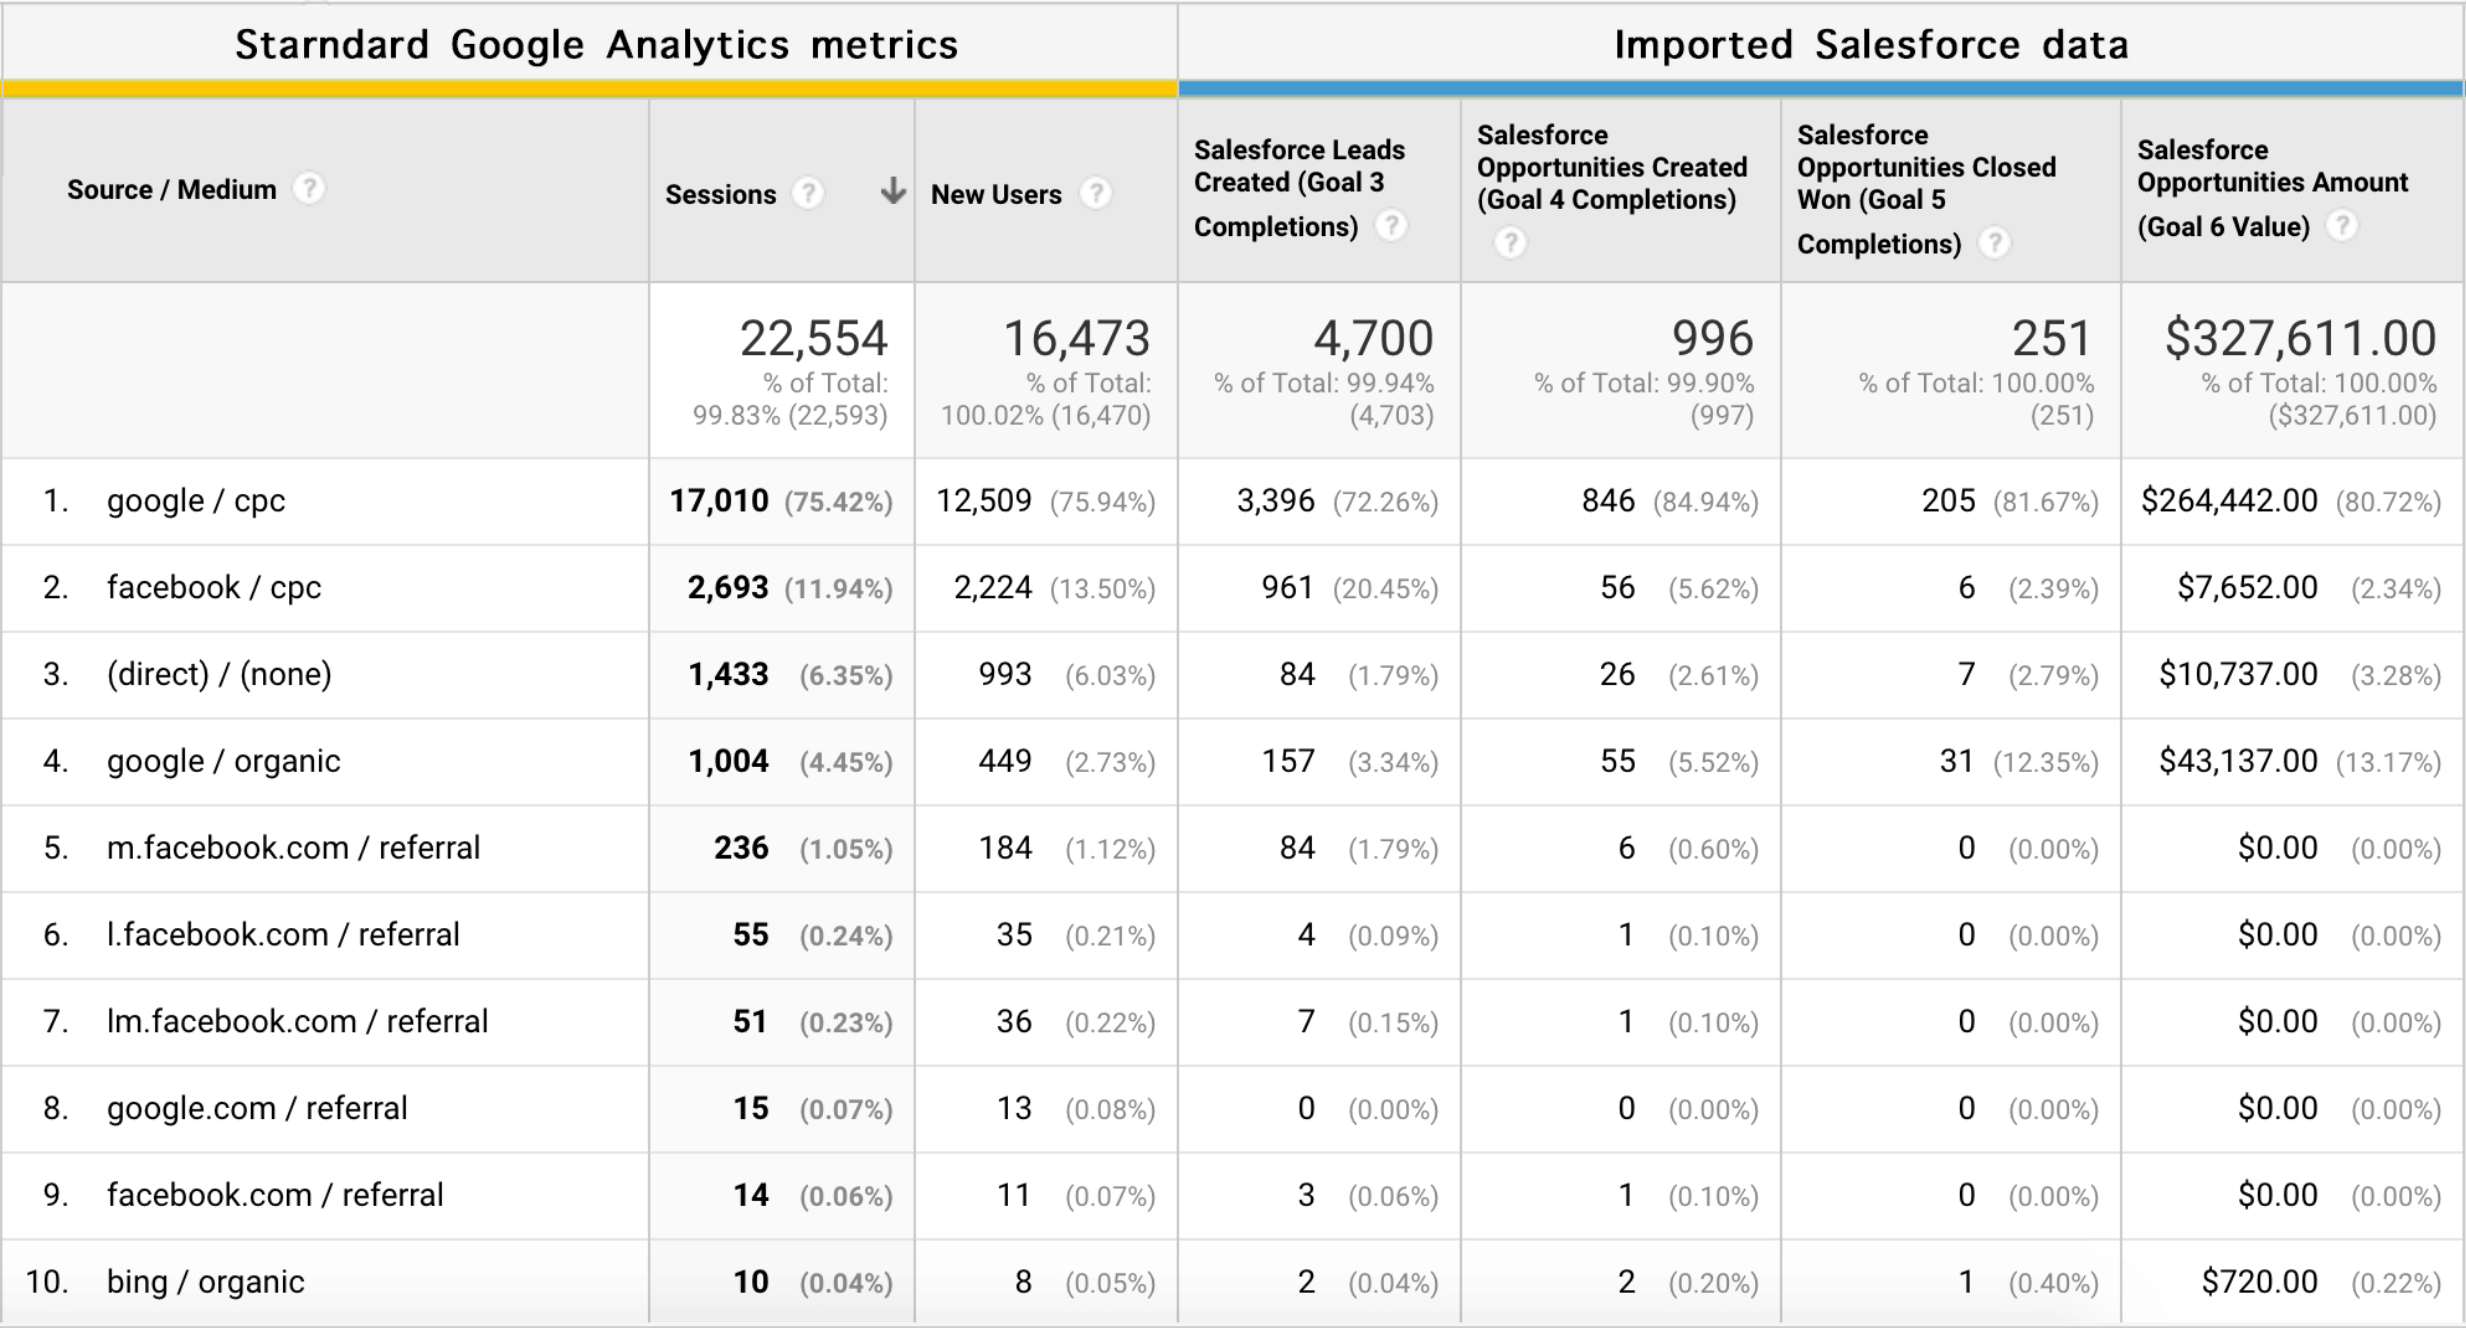
Once your campaign is running and data starts flowing into Google Analytics, go to GA and navigate to Report - Acquisition, then set the view to source/medium.
From here, you’ll need data literacy skills and solid knowledge of how to use GA.
Closing thoughts
Thanks for taking the time to read through this. I hope it’s been useful. If you have any questions, feel free to reach out at nhatnguyen.work@gmail.com - I’m happy to help.